Feeds:
Posts
Comments

Several weeks ago I first wrote about gender in woodworking, and its a subject I’ve continued thinking about.

Soon after my post several weeks ago I found myself talking with an teacher I had in middle school. I’ve been substitute teaching for the woodshop teacher I had as a kid for a couple of years, and it’s always fun to reconnect with my old teachers. This teacher in particular started off teaching computer science and had many of the same difficulties that are present in shop classes: a lack of women. When he first started teaching, even when he explicitly worked to recruit young women for computer science or shop classes, through some set of forces they are still choosing not to take them. Perhaps their parents are not encouraging them to take these classes, or perhaps stereotypes surrounding gender roles are playing their part, or perhaps there are simply fewer role models in these fields for them to look up to. He had some success at increasing the number of female student through actively polling female students for what sorts of classes they were interested in taking, and he was able to increase the number of female students by offering courses that focused more on applications and graphic design. Thinking about polling female students may have its own set of issues related to some classes potentially being viewed as the female offerings, versus male offerings, but it is at least a step in the right direction as far as creating more balance withing the field and creating a path for people to test the waters in a field the might discover they really like, and might continue in. Regardless, the high school shop classes that I was teaching that week were exclusively male, and I haven’t had a female woodworking teacher since I was very young. It left me wondering if polling female students for what sort of woodworking class they might be interested in taking could be a strategy to increase the number of female woodworkers.

I suppose one of the reasons this issue is so important to me is that woodworking has been such an empowering and positive force in my life. Its hard to imagine that if I had been born a woman there would have been forces working against my having it become such an important part of who I am. I’m not sure how to describe it exactly. There is the pride in being able to fix things which is important, but there is also something incredibly fulfilling about walking past and using furniture I have built on a daily basis. There is also something gratifying about being able to the things I have poured my creativity into with others. Building practical objects, and striving for the highest level of perfection while working with a material that is organic and imperfect while it also has so much warmth makes it a really unique craft. Its hard to imagine it not being open to all, without barriers or stereotypes to contend with.

As I started thinking about the woodworkers who have been most influential to my own work, they were all male. Perhaps foremost among those figures is the shop teacher I had from 4th grade through high school, a man named Tom Tucker. In furniture Hans Wegner, Wharton Esherick, George Nakashima, Sam Maloof, and Carlo Mollino immediately come to mind. Even the current woodworkers whose blogs I follow are almost all male: Christopher Shwarz, Peter Follansbee, Gary Rogowski, Chris Wong. At ADX, where the boat school is based out of and where I now rent a small amount of space for my personal woodworking, all spaces on the factory floor are rented by men despite the presence of many capable female woodworkers who use the space.

Its a small gesture, but one of my goals is to pay more attention to the female woodworkers I encounter and to share their work on this blog. Perhaps there may be a budding female woodworker who can find someone they can look up to through these efforts.

One story that seems particularly pertinent with the recent coming out of Bruce Jenner is that of Jennie Alexander, who was born John Alexander and transitioned several years ago. Her work can be seen at http://www.greenwoodworking.com/. Thanks to Marilyn over at She Works Wood for pointing me towards her work.

A local woodworker whose name came up in a conversation I had recently is Amanda Wall-Graf. I couldn’t say I know much about her, but looking at her website, it is clear that she does wonderful work. The craftsmanship (potentially problematic term. Is there an un-gendered alternative which isn’t overly combersome?) looks to be top-notch. Her aesthetic is modern, clean and elegant. Especially as someone with deep roots in the Pacific Northwest, I really appreciate her use of local materials. You can check out her work online at http://www.henoshop.com/products.

A broader resource to support the effort to support female woodworkers is the Women in Woodworking website. I haven’t perused all the resources they have available, but they have links to the websites of women doing everything from building medieval crossbows to relief carving to making fine furniture. There is a lot of high quality work represented on the site. Its worth a look-through.

Gender

In an unusual break from the typical themes of my blog, this post will be related to gender issues, and how those issues relate more specifically to woodworking.

I just read this article written in 1883 on the Lost Art Press blog and was completely floored. Good god. There is so much that is so wrong going on in this article that I’m really not sure where to begin. The stereotyping of women is unbelievably offensive. As I read it, I found myself feeling glad for a moment that we have come as far as we have in the past 130 years.

Then I found myself checking out a blog that WordPress suggested because it’s related to other blogs I read, and I found myself reading her about page:

http://sheworkswood.com/about/

Growing up in the South, the writer wasn’t even allowed to take a shop class because she was a woman! I think the writer is just old enough that this isn’t necessarily surprising, but especially as a teacher it got me a bit fired up. What kind of jerk who calls themselves an educator actively prevents someone from learning something they are interested in! It also brought the profoundness of these issues back to the present for me.

As an educator myself, teaching with the Wind and Oar Boat School, I still see the effects of gender bias on a daily basis. Especially when we are introducing new power tools, I have had young women on numerous occasions give me a look of surprise that I am actually handing them a power tool. Often is seems like they are surprised that I am handing them the power tool or chisel as if I shouldn’t trust them because of their gender. I It is my hope that they find the experience the boat school provides empowering.

Recently one of the guys I see at ADX that I haven’t gotten to know well yet arrived wearing a skirt. It was fascinating for me to overhear different people reacting in a wide variety of ways while I continued working. Some were super excited and supportive, others seemed to tease him and give him a hard time. Regardless, it was definitely treated as something that was not normal. As I was leaving to teach a class, I had a short conversation with him and asked if it was his first day wearing a skirt at ADX, and whether he was surprised by people’s responses to it. He said that he had been crossdressing around town, but that it was the first time he had worn a skirt to ADX, and that during the morning some folks had been jerks while others had been supportive. Seeing the range of reactions people had left me thinking about how I could be supportive beyond simply not treating it as a big deal.

Clearly, the messages in our society regarding gender run deep. As someone who works in a maker space, who works with wood and spends a lot of time in hardware stores and lumber yards, I am sure that I enjoy a lot of privilege as a straight white male. Thinking about the female student’s I have taught, about this woman who wasn’t even allowed to take a shop class, and about the really intense stereotyping in the article shared by Lost Arts Press has me wondering how my female colleagues at ADX or teaching with the boat school may be impacted by their gender and assumptions made about them because of it.

I don’t think I have any profound conclusions to offer, except to say that I’ll be carrying an increased awareness of these issues with me over the coming week. I’m curious so see what conversations it leads to and what I might learn.

Over the weekend I took my Shearwater out to explore a new spot. Too often, I have taken my kayak or even the Shearwater out to familiar spots. There is nothing wrong with revisiting favorite spots, but its important to cover new ground, especially in a boat where there always seems to be some promise of adventure.

After spending some time on google maps and looking for boat ramps I decided to check out the Chinook Landing Marine Park. It is located about a mile west of where the Sandy river enters the Columbia. The put in was quiet and I got underway quickly under oars. The weather reports predicted light and variable winds so I had not even bothered to bring my sailing rig along. It would also have been a hindrance for parts of my intended journey. I had never checked out the spot where the Sandy river hits the Columbia and while looking at google maps, I had discovered a small channel running that split off from from about a mile up the Sandy to the Columbia well east of where most of the rivers meet. Seemed like a worth while channel to investigate.

The initial row upriver went well, working against the current, but with lovely weather and few other boats to contend with. The entrance to the Sandy lived up to its name. The mouth of the river was braided with various shallow islands interspersed. I ducked into the first channel I came to as much to get out of the current as anything, and promptly grounded. I proceeded to form and test a wide variety of conjectures as to which bank or sandy island I was too close to and where I would find deeper water, but the moral of the story is that I ended up walking my boat through shallow water much of the way over the mouth of the river before finding what could be called the main channel. The water was cold on my bare feet, but not unbearable. I found myself wondering how much time Lewis and Clark spent wading through water while dragging their various boats.

After finding the main channel I was able to row perhaps a quarter or half mile before grounding again. This time I didn’t have to walk my boat quite as far before finding deeper water. By this time I was definitely beginning to feel like a proper part-time adventurer by this point. After another 15 minutes of rowing up river, always keeping an eye on the depth of the sandy bottom I spotted a narrow side channel that led into the woods.

As I neared the channel I watched the river bottom become much more rocky and carefully maneuvered myself to where the current pulled me down into the side channel I had seen in the maps. It was narrow and I could see riffles in the surface down stream just before it ducked around a bend. I pointed my stern down the channel so that I could see where I was going and wondered what I would find.

I carefully watched the riffles and worked to stay in what seemed like the deepest portions while avoiding fallen trees as the narrow channel wound its way through bend after bend. Eventually it slowed and I found myself among a collection of low islands. I pulled my grandfathers binoculars out of their case to see what birds were around as I continued drifting stern down flow. I spotted a kingfisher which I always enjoy, but didn’t see too much else.

While I was drifting backwards, I found myself musing about the parallels between exploring new areas by boat and starting new endeavors in your life. I didn’t expect to find myself grounded so many times, and I didn’t know what would happen around each bend of the small channel I drifted backwards down. As I start a small business with an initial run of the chair I recently designed, there are so many unknowns. I’m not sure where it will lead or what all the challenges are that I will face. Thankfully, at the moment I am still doing a lot of teaching for the fabrication team at ADX and teaching with the boat school, so my current risk is limited. I’m also excited that with a bit of luck I will have a bit of space to keep more tools and chair parts at ADX which will help my productivity. At the moment, I am excited about my future prospects and proud of the work it has taken to get where I’m at. I’m excited to see what’s around the next bend. Along the way I’ll try to enjoy the view.

IMG_1489 IMG_1490 IMG_1493Look! Aquatic mammal!
IMG_1495

Mount Hood and the Columbia River Gorge in the distance. If you zoom in, you can see the Vista House.IMG_1496 My grandfathers binoculars.IMG_1491 All the rails, arm parts, and legs roughed out for 5 chairs.IMG_1499

Here are some better pictures of my three legged side chair. At some point I will get some help from someone who knows more about photography than I do, but here they are all the same. In particular I wanted to share some of the details I have enjoyed figuring out on this piece. Every piece is curved or turned. Every piece has both tenons that fit into a adjoining pieces and a mortise to accept another piece. The legs are canted and splay out for stability. The seat and seat back are laminated. All these details make the chair both challenging and satisfying to build.

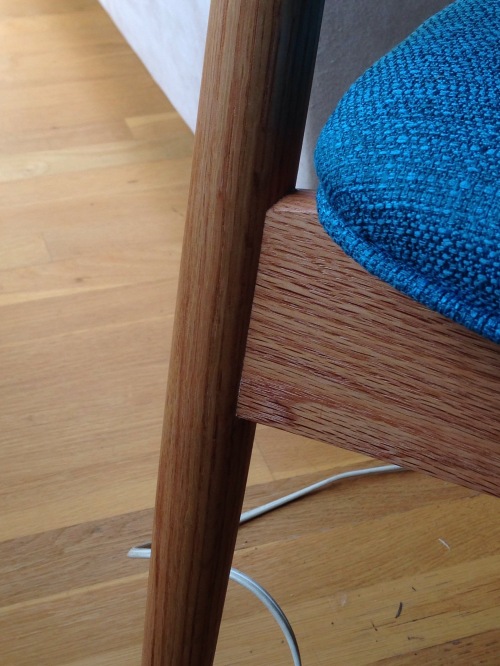
Perhaps most challenging parts to cut well are the shoulders of the tenons where the rails meet the legs. I decided that for a clean aesthetic the shoulders had to fit the radius of the legs. Cutting the shoulders takes several steps and utilizes both carefully made jigs for my router and hand work with a chisel. IMG_1455

The holes that the let tenons fit through on the arms must be precisely cut to match the angles of the legs which are all canted out for stability. This picture also highlights what seems to be becoming my signature detail: The tenons with black walnut wedges.
IMG_1462The sweep of each curve must gracefully lead into the next. Though I liked the curves on the prototype, every curve has been tweaked for the revised set of patterns that I will use on the next 5 chairs. The final chairs will have plugs covering the screw holes for mounting the seat back.

IMG_1450

The design has the minimal number of pieces needed for an upholstered chair with arms, but there is plenty to draw the eyes in for a second look. It is both light weight and elegant. IMG_1442 IMG_1444

IMG_1443

The Side Chair

The chair that may launch a furniture business! Though I continue to enjoy the teaching I do with the boat school, there are often gaps between those classes or times when there are simply fewer classes running. Those gaps must be filled! After finishing the Shearwater, furniture became the focus of my personal woodworking and it’s been a productive couple of months. Among other pieces, I finished a Tage Frid designed Three-Legged Stool, a chair inspired by a Wharton Esherick, and I designed and built a chair which drew much of its inspiration from several of the greats in danish modern design including Hans Wegner and Finn Juhl.

With the completion of a prototype for my most recent chair design, I have decided to start a small furniture business. My plan is to design and build small runs of furniture. I am starting with a light-weight side chair. The next design I have in the works is a lower lounge chair in a similar style. I will start work on a website dedicated to this side of my woodworking soon, but I’d like to introduce my first design here now.

The design brief that I set for myself was fairly simple: a light weight side chair for use in a living room. After finishing my Tage Frid three-legged stool, I was struck by how much my housemates moved it around. I would find it in a different part of the living room every few days after it was finished. Its light weight allowed for a much more flexible use of the space in the living room, which also led to the space being used more. This design was conceived as a way to continue what began as an inadvertent experiment exploring how people use communal spaces. I wanted to design the sort of chair that friends could pull up to a coffee table for playing games, or which could be used as additional seating in the dining room. At the end of the day it can be quickly returned to wherever it typically lives. Throughout these uses, the chair had to be comfortable. I began collaborating with my upholsterer early in the process to ensure that the final stages of the project went smoothly. In addition, I wanted to design a chair that was elegant, distinctive and fun.

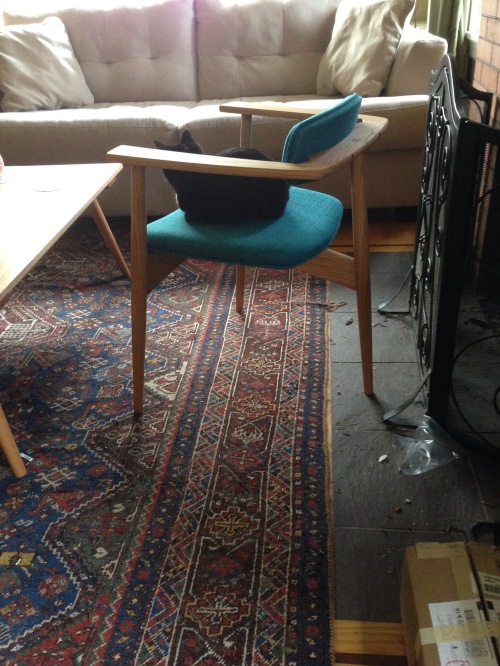
You can see the result below. I finished it a little over a week ago and so far the reactions have been overwhelmingly positive. Everyone comments on how comfortable it is. One part of the chair that continues to elicit positive feedback is the backrest which people find to to be at just the right height and angle to support their lumbar without being large.

I am gearing up to produce a small run of these chairs. I have worked to better organize my shop for chair making, and after getting feedback from a wide range of people, I will be making a range of minor adjustments to improve the aesthetics and the comfort of this initial design. Last week I visited Zena Forest Products and purchased enough Oregon White Oak to produce 5 more of these chairs. I expect the price to come in at between $600 and $800 dollars upholstered. I will be able to offer a more solid price as I near completion of this initial run.

If you are interested in purchasing one of these chairs, please let me know.

IMG_1418

Even cats find it comfortable.

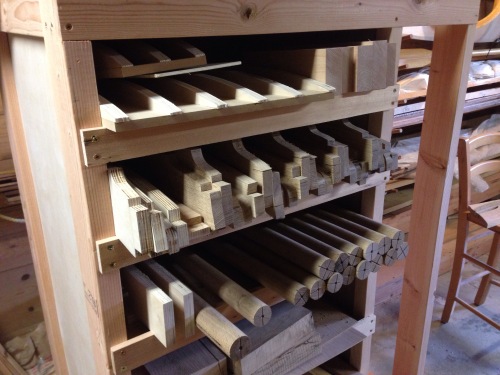
IMG_1417The set of rolling cubbies I built earlier this week to keep chair parts, jigs, and patterns organized. Organization is one of the keys to an efficient shop.IMG_1434 

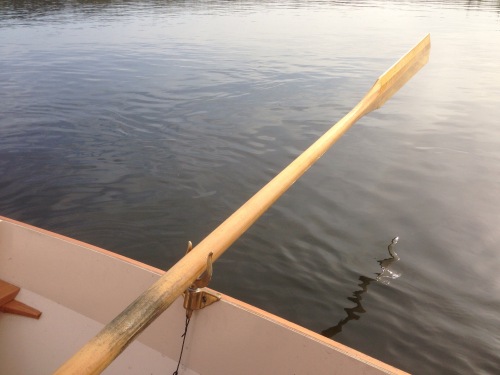
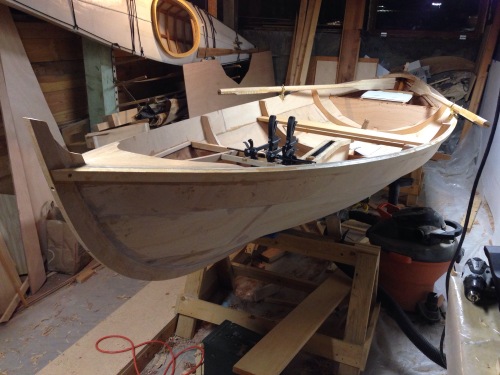
Before starting to share my newest endeavors involving chairs, I thought it would be good to share the end of the process building my Joel White designed Shearwater that I finished up at the end of the summer. Where I left off in early July the deck beams were fitted but not yet glued in. With those pieces glued in I decided to coat the interiors of the compartments in epoxy before painting. These were the only parts of the boat that I epoxy coated.IMG_0935 IMG_0933 With the deck beams glued in and trimmed flush with each other I started fitting the decks, thwarts and other interior details.IMG_0931With the boat upright, hardware in hand, and shaping on the oars proceeding well I had to mock things up. Keeps the imagination alive and motivation up!IMG_0929First primer on the boat! I used Interlux Pre-Kote for the priming and painted the interior with Interlux’s Brightside in Bristol Beige.
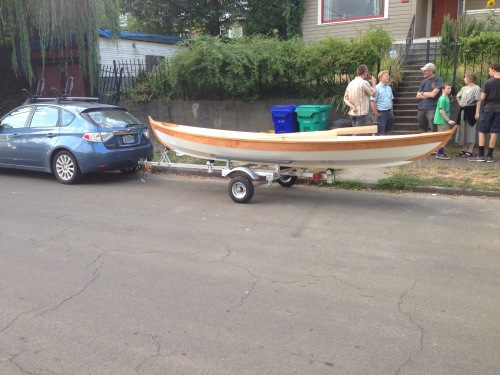
IMG_0936I managed to coax my twin brother into helping me assemble the trailer one weekend while he was down from Seattle. It went together easily, is light weight, and highly adjustable though I still need to trouble shoot why some of the less important lights don’t work.
IMG_0938 Paint inside the compartment.IMG_0939Here you can see the middle thwart sitting on the thwart supports and straddling the center frame. I took inspiration from Iain Oughtred’s designs and his book on lapstrake boat construction in many of the alterations I made to the design, and the tapering shape of the thwart supports are one example of this.IMG_0940 The finished trailer! Waiting for a boat.IMG_0942The slots for the mast and hatch cut out. I cut them out roughtly by drilling and using a jigsaw, but used a router with a flush trim bit to finish the job precisely.
IMG_0946 IMG_0947Here you can see the accent pieces I added to the inboard ends of the compartments which are rabbeted to sit down over the joint between the deck and the bulkhead. Their inboard edges are curved to follow the curve the thwarts which taper towards their outboard ends.
IMG_0953IMG_0956Ah, the mast partner. I built this fun little assembly out of Oregon White Oak to tie things together and reinforce the spot where the mast passes through the deck. It pleases me.IMG_0960Time to mask before painting! I tried to keep varnishing down to a reasonable level, and think I struck a reasonable ballance.
IMG_0963Whoa! That first coat of primer is always kind of exciting and shocking as the boat transforms.IMG_0964IMG_0965Here the interior paint is on and the initial coats of varnish are on the exterior. I couldn’t help myself on the stem and stern-post; all that lovely clear tight-grained fir! Varnish down to the waterline! Oh yea, and the shear strake. That got it too.
IMG_0968IMG_0969Flipped over again for final filling. fairing and sanding.IMG_0973With primer on the outside the varnish really started to pop.
IMG_0978-0Painted and ready for hardware. Here you can also see the brass half oval applied to the stem and most of the way down the keel.IMG_0981IMG_0984IMG_0985With painting complete it was time to invite friends over for a bbq for a defenestration/ oot-the-windae party! I would have more pictures of it going out the window, but it happened too damned fast! I could have built a boat which was at least an inch wider and deeper! Its always interesting to see how different a boat looks outside and sitting lower. I was struck by how shallow a boat it is!IMG_0990-0IMG_0989-0

IMG_0987IMG_0988-0After a weekend which included rowing the new boat several dozen miles, it was time to get down to work on the sailing rig. I couldn’t find any gudgeons which were relatively inexpensive or which wouldn’t have to be shipped from overseas, so I bought some brass ( I know, but realistically the boat will not be spending all that much time in salt water), and I got some help machining my own. Many thanks to David at Veteran Bicycle! Here they are partially shaped.IMG_0995Tapering and 8 siding the mast and spars was done initially with a power planer. So much noise and so many shavings in a short period of time! Final shaping to the lines was done with hand planes.
IMG_0994Gotta love 16 siding.IMG_0997Here the rudder with push-pull tiller is most of the way complete.IMG_0999With the sailing rig done it was time to head north for the Wooden Boat Festival in Port Townsend!IMG_1001

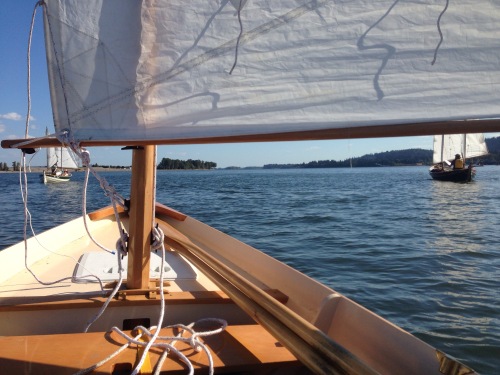
Parting shots! Maybe I should have taken more time to get to know my boat first, but it performed admirably on a its initial shake down trip starting in Cathlamet Washington and sailing back to Portland. I met up with Bruce and Kim on their respective Arctic Terns my first morning out, and we had a wonderful time, with following winds almost the entire trip.
IMG_1018 Sometimes you need to get a sense of scale for how large your boat really is. Thanks to Bruce for taking this shot!IMG_1028 A quiet and peaceful evening sail this past fall.IMG_1207 IMG_1204Having completed the boat, I couldn’t be happier. It is fun to row and sail. Its quick to rig and to put away. That being said it is a small boat. On several occasions when the wind and waves have started to build I’ve dropped sail and switched to oars. Every time I’ve done so I have been struck by how much things quiet down and by how well it rows even in fairly rough water. At some point I would like to build a larger sail and oar boat for adventures further afield in more open water, but for the time being I’m happy to get this boat out and to enjoy it as much as I can. Its also hard not to smile every time I pull the tarp back.

Please let me know if you have any questions regarding the nerdy details of the build. I’d be happy to answer!

The submissions for the Coffee Table Build Off are all posted, and there is the opportunity to vote on your favorite. The one with the most votes will apparently get some sort of Viewers Choice award. I think mine stacks up nicely, but take a look through the submissions. There are some really nice designs. If you happen to think mine is the most attractive design, please vote for it! If you like another one more, I suppose you should vote for that one instead! Either way, enjoy, and many thanks to Neil Cronk for putting this on.

http://www.cronkwrightwoodshop.com/coffee-table-build-off/coffee-table-build-off-entries-1-5/

DSC_0122_2


My coffee table is done. Its description and photos have been sent off to Neil Cronk at the Cronkwright Woodshop. Many thanks for the help I received from my brother Joseph photographing it. Many thanks also to Neil Cronk for putting this event on. I’m getting excited to see everyone else”s submissions and wondering a bit how mine will do. Here’s what I sent in.

Dimensions: 48″L, 22″W, 16″T
Materials: White Oak with Black Walnut wedges.
Design and Build:
This design was inspired by several old benches in a book called “We Sit Together: Utopian Benches From the Shakers to the Separatists of Zoar” by Francis Cope. I was intrigued by several of these benches in particular because despite being quite old, there was also something about them that was distinctly modern. Their simplicity, and the long straight taper of their legs resembled many pieces of danish modern furniture. There was something timeless and elegant about these benches which I tried to achieve with my coffee table design. I also enjoy the subtly subversive themes discussed in the book. Perhaps by building myself a high quality piece of furniture in what I hope is a timeless design I have circumvented consumerist culture and carried this idea into my coffee table?
The top is composed of three edge glued planks. The legs were turned. In order to allow the tenons of the legs to pass through the top while also accounting for the expansion and contraction of the wood in the top, I split each of the visible cross pieces into two halves with a narrow gap between them. A pair of secondary cross pieces provide additional stability across its width. The cross pieces are all fitted into partial slots which were routed and squared up with a chisel. The wedges in the tenons are black walnut for contrast. Screws are stainless steel. The finish is composed of 4 coats of Watco and layer of paste wax. I’m not sure the 4th coat of oil was entirely necessary.
DSC_0122_2
DSC_0101_2DSC_0111_2DSC_0137_2IMG_1144_2

With less than a week to go, my coffee table is fully assembled. Tomorrow I’ll start finish work, but let me show you some of the steps since my last update.

I glued up the top! Nothing very exciting here. Three White Oak planks edge glued with many clamps holding them together and flat.

IMG_1087


The table has what appears to be a full width apron (or at least I’ll call it an apron until I come up with a better term), and a partial width cleat at each end of the table. These are set into slots which run for only part of those pieces lengths. These slots help provide additional stability for the legs and strength for the cleats while also ensuring the screws have plenty of meat to bite into.

IMG_1089


Drilling the holes for the tenons was interesting. I used an engineers square and a sliding bevel to provide references as I drilled these holes. Not my favorite step of the process, and I ended up needing to get creative to correct the angle of one leg later on.

IMG_1098

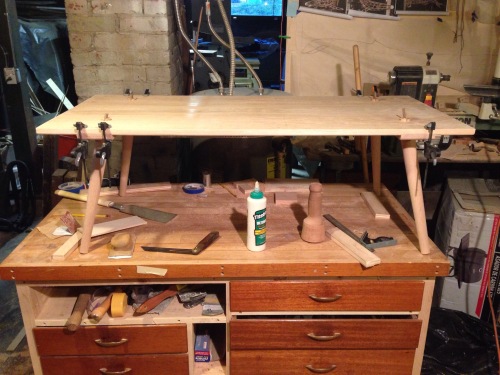
With the holes drilled I was able to do an initial test assembly to see how it would look.

IMG_1101Here you can clearly see all the slots for the various pieces as I did some final, pre-assembly sanding.

IMG_1141

After a variety of other steps I won’t go into, everything was ready for assembly! You’ll see that I’ve cut the aprons into two pieces. I did this along with over sizing the screw holes in these pieces and the cleats to allow the wood to move naturally with moisture changes without affecting the through tenons of the legs where they go through the top.

IMG_1144


I’m please with how its looking. I’m not usually a fan of using a round-over bit with a router because it has the potential to leave the wood looking more like its been machined than worked by hand, but I like the effect of routing the end of the aprons and the underside of the table top. All that remains to be done before I apply finish is to shape the bottom of the legs, cut the tenons flush with the top, and to sand the top.IMG_1145IMG_1152IMG_1153IMG_1154


Many thanks to Neil over at Cronkwright Woodshop for putting on the Coffee Table Build Off which is now under way! The first weekend is coming to a close and I’m feeling good about the state of my design and the first two day’s progress. I’ve taken a few minutes to check out some of the other competitors and from the little bit I’ve seen it looks like some really cool designs are going to be built. For my part in this, you can expect a fairly conservative design, without anything too ground breaking, but I think the result is going to be very handsome.

Earlier this week I started pulling some old boards off my lumber rack, and was happy to discover that I had all the wood I needed! There was a pile of oak left over from a project I never got far along with that had everything I needed including 4 pieces already cut to length which would be perfect for turning the legs of my table.

IMG_1080


On Saturday I turned each of the legs into a cylinder, but I wasn’t sure how long I wanted the legs to be, so I stopped there.

IMG_1083

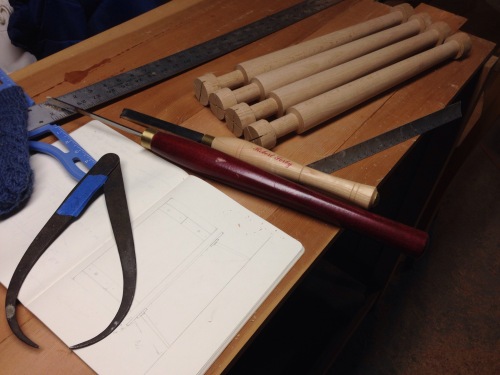
Today I spent some time thinking more specifically about dimensions and drew a small scale plan for this table. With the dimensions figured out I went ahead and turned the tenons, tapered, and sanded all 4 legs. They are pretty much ready to go. At 2 days in I feel that, if anything, I’m ahead of schedule! Now I just have to keep it that way. Next step will be cutting the planks for the top and gluing those together.

IMG_1084